How to manage your church's small groups using Breeze.
Whether you’ve been hosting small groups for a while or you’ve just started the process, the task of establishing groups and managing them in an effective way can often be daunting, so we’re here to help.
With the use of some of Breeze’s core features, such as Tags, Events, and Users and Roles, you can easily keep track of your growing small groups and focus on what you do best – ministry!
Here’s how to manage small groups in Breeze...
Establish Your Groups
The best way to establish your small groups in Breeze is with the use of Tags.
Tags act as the group management tool in Breeze, allowing you to sort your people into specific groups and communicate with them directly. This is perfect for small groups!
1. Create Folders and Tags for Your Groups
For optimum usage of Tags, we suggest organizing them in a folder to tag structure that breaks down subcategories and keeps everything tidy and easy to find.
Think of the this as your digital filing cabinet, where a folder can either be used to hold information (the tags), or can be used to hold other folders for hierarchical organization.
Simple Small Group Structure:
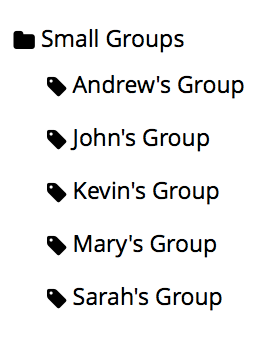
If you’re just getting started with your small groups, or have a more simplistic structure, you can simply create one tag folder called Small Groups to hold all of your individual group tags.
Here’s what "Small Groups" folder with Individual Group Tags would look like in Breeze:
More Complex Small Group Structure:
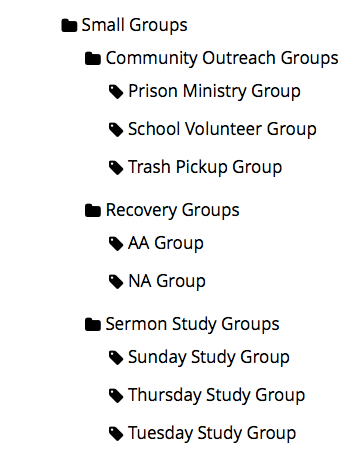
If you have a lot of small groups that are categorized by topic or purpose (such as Recovery Groups, Community Outreach Groups, Study Groups, etc.), it may be beneficial to have one over-arching folder called Small Groups and then folders for each of those subcategories inside of that. You would then add the respective tags to each folder.
Here's an example of "Small Groups" folder with Group Category Subfolders and Individual Group Tags:
2. Add People to the Small Group Tags
Now that your folders and tags are created, it’s time to add people to the individual small group tags! You can do this from a person’s profile, from inside the tag itself, or you can bulk add individuals from the People section.
Assign Tags: To assign an individual person or multiple people to a tag: Select the "Tags" tab from the top left. Navigate to the folder containing the tag and click the tag. On the right, click "Add People to Tag." Begin typing the person's name. The name will appear in a dropdown list. Select the person's name. Repeat steps 4 and 5 until everyone you'd like to add has been selected, then click "Add." Alternatively, you can assign multiple tags to a single person. To do this: Navigate to a person's profile page. Click "Tags" from the left menu. On the right, click "Assign/Unassign Tags." Select the tags you'd like assigned/unassigned to that person. Click to save your changes.
Create Events for When Your Groups Meet
If you are not interested in displaying your small group meetings on your website, tracking individual group meetings on a calendar, or taking attendance, feel free to skip on down to step 3!
Now that your groups are established within Breeze, the next thing you’ll want to do is create events on your calendar for your small group meetings!
Having these event dates and times listed on the calendar allows you to make your groups visible on your website (by embedding the calendar), and to all of those with Member Access in Breeze. If people can see what groups are happening when, they’ll be more likely to get involved.
1. Create a Small Group Calendar
The first step to getting all of your group dates and times listed in Breeze is to make sure you have a Breeze calendar to store all of your Small Group events.
Simple Calendar Setup:
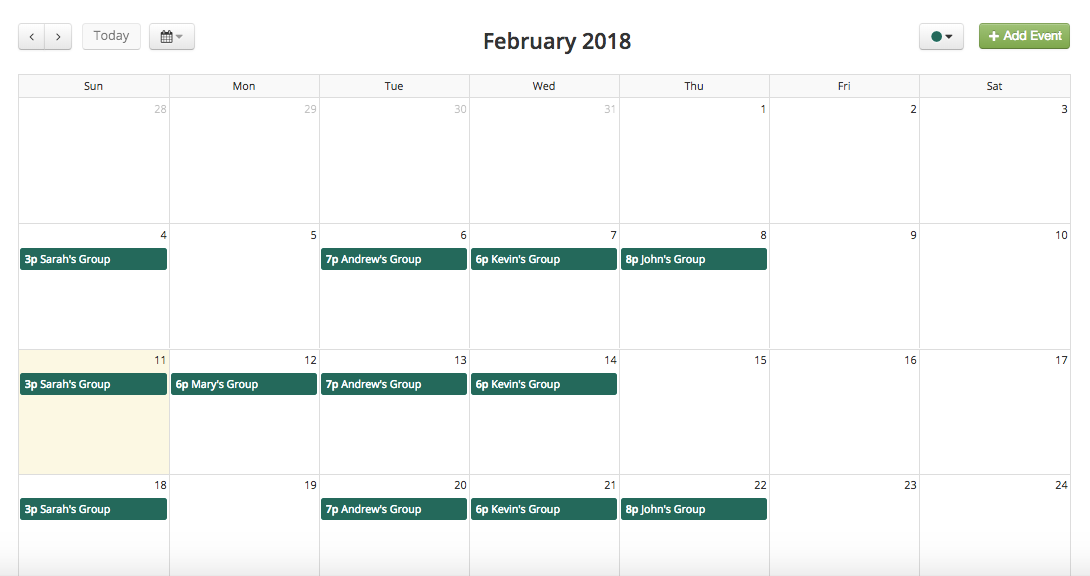
If you only have a few small groups, or they don’t have any special categories to them, you can simply create one new calendar and call it “Small Groups.” This is the calendar in which you’ll create all your new small group related events!
Here’s what this looks like in Breeze:
More Complex Calendar Setup:
If you have a more complex build of small groups, such as Sermon Study Groups, Community Outreach Groups, Recovery Groups, etc., and have multiple groups within these categories, then you may find it helpful to have separate calendars for each of your group categories.
Here’s what this looks like in Breeze:
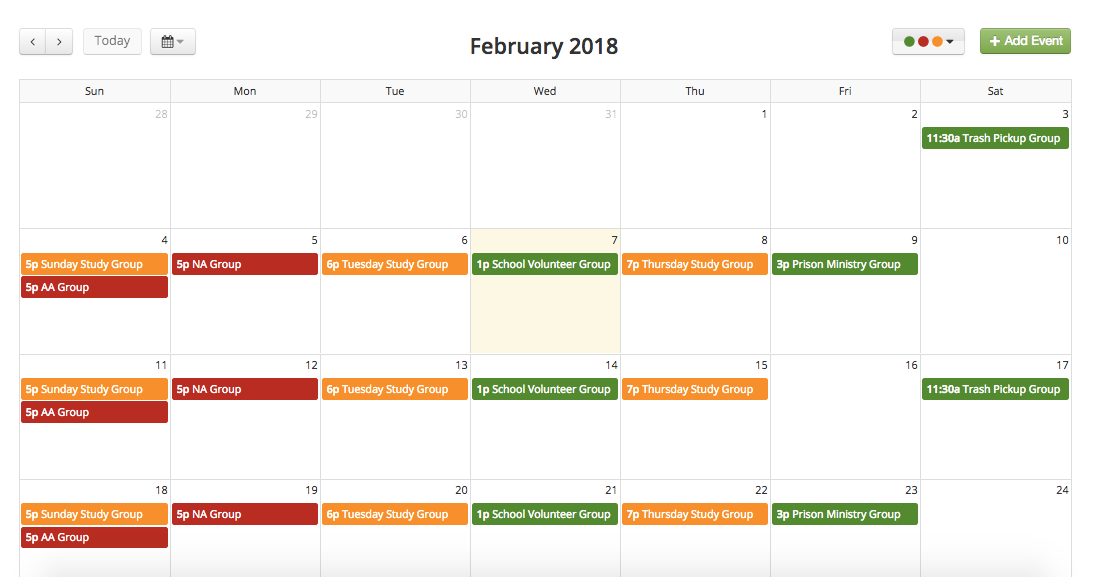
In the example above, there is a green calendar for the Community Outreach Small Groups’ events, a red calendar for Recovery Groups’ events, and an orange calendar for the Sermon Study Groups’ events.
2. Create Specific Events for your Small Groups
Now that you have your separate Small Group calendar(s) created, it’s time to add your specific events!
When creating the events, it’s important to include a description that gives individuals a better idea of the group’s focus: whether that be a study of a specific book of the Bible, a suggested age range, whether childcare will be provided, etc.. The event description should also include the address where the small group will take place.
Having detailed descriptions saved for each event will allow individuals who see this calendar to easily find a group that is tailored to their needs, discussion preferences, and geographical location!
If you decide to use your church building for small groups, you can even use the Location option in the event settings for room management, to ensure you do not double-book the specific room(s) needed.
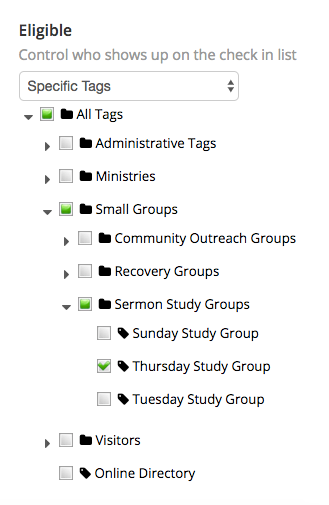
Set Tag Eligibility for Check In
If you aren't interested in tracking attendance for your individual small groups, feel free to skip on down to the Set Permissions in Users & Roles section!
This is where all of your hard work comes together!
The Check In section of Breeze plays a vital role in helping to keep track of who is involved in what ministries, and who may need a little more one-on-one attention.
To make it simple for your small group leaders to take attendance, we suggest making their specific small group tag eligible for check in at their event. This will limit the names on the check-in roster to be only those who are currently assigned to their specific small group’s tag.
If tracking attendance, you can even set Alerts for your event to help your leaders keep track of who they may need to reach out and speak with or who may be slipping through the cracks.
Set Permissions in Users & Roles
Now that all of your groups and their events are set up in Breeze, it’s time to create user roles for your small group leaders! This will ensure they have the proper permissions to communicate with and view the people in their groups, as well as view and edit the appropriate calendars/events.
It is important to note that while the Users and Roles section will allow you to set permissions for your users, it is recommended that all volunteers (especially those with leadership roles), also be vetted by other means (such as background checks), before being given access to sensitive personal information.
If you have a very simplistic structure for your small groups you can simply create one role called Small Group Leader.
If you have several categories of small groups, you may want to create different roles for different group leaders of these categories. This can be important if you have small groups that deal with sensitive information, such as recovery groups. You would only want the group leaders for these specific groups to be able to view these tags, the people in them, and the attendance for the events.
Give Your Leaders Access to Their People
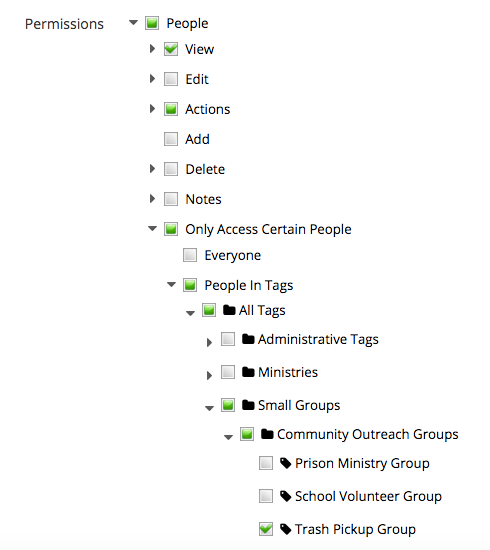
In establishing permissions for your small group leaders, you’ll want to give them the ability to view the people in their tag and communicate with them.
- This can be accomplished by selecting the “View” and “Actions” options below the “People” permissions. To limit the leader’s view to only the individuals in their specific tag, you’ll also need to make this selection in the “Only Access Certain People” > “People In Tags” > their specific small group tag.
Here’s what this looks like in Breeze:
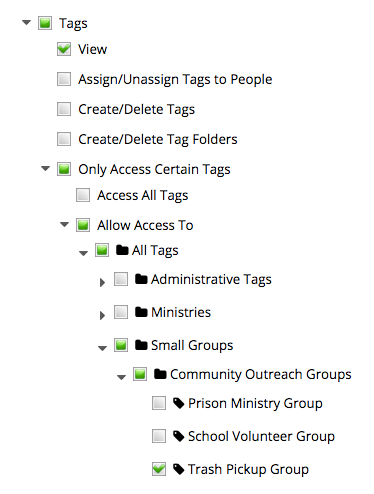
Let Your Leaders See Their Tag
To allow your small group leaders to be able to view their own tag, you’ll need to select “View” under the “Tags” permissions and then select “Only Access Certain Tags” > “Allow Access To” > their specific small group tag.
Here’s what this looks like:
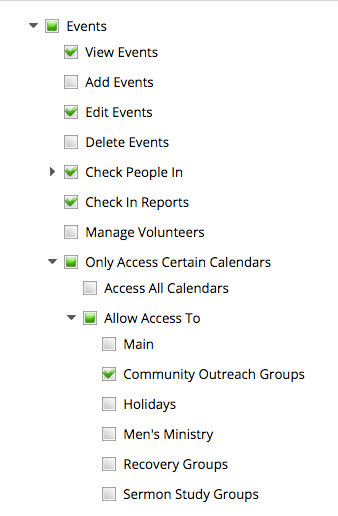
Allow Your Leaders to Keep Attendance
If you’ve opted to create a calendar for your small group, log individual group meetings as events, and keep track of attendance, you will also need to establish permissions for Events.
To allow your small group leaders to view their events, edit the description/settings to their event, and track attendance, you’ll need to select “View Events,” “Edit Events,” “Check People In,” and “Check In Reports.” To limit these permissions to a specific calendar, you’ll then need to select “Only Access Certain Calendars” > “Allow Access To” > their specific small group calendar.
Here’s what these permission settings look like in Breeze:
Congratulations, you’re now well on your way to establishing and managing small groups at your church with the use of Breeze!